 Cart ( )
lmages are for reference only See Product Specifications

Arduino A000005

- Part No.:
- A000005
- Manufacturer:
- Arduino
- Package:
- Datasheet:
-
 A000005.pdf

- Description:
- ARDUINO NANO ATMEGA328 EVAL BRD
- In Stock:
- 1631
- Quantity:
- Add To Cart
- For more detailed including pricing and shipping


- Quick response, quick quotation

- Flash shipment, no worries after sales

- Original channel, guarantee of the authentic products
Please send RFQ , we will respond immediately.
 Purchase and inquiry
A000005 Specifications
- Package/Case:
- Packaging:Box
- Series:AVR® ATmega
- ProductStatus:Active
- SensorType:Evaluation Platform
- OutputType:MCU 8-Bit
- REACH Status:AVR
A000005 this integrated circuit is available in factory sealed anti static packs. at icwhale.com. Please read product page below detail information. including A000005 price, data-sheet, in-stock availability, technical difficulties. Also. Quickly Enter the access of compare listing to find out replaceable electronic parts. If you want to retrieve comprehensive data for A000005 to optimize the supply chain (including cross references, life-cycle, parametric, counterfeit risk, obsolescence managements forecasts), please contact to our Tech-supports team.
Purchase in icwhale.com
There is no doubt that you may place an order without registering to icwhale.com.
We strongly suggest you sign in our shop before purchasing as you can track your order real-time tracking.
Means of Payment in icwhale.com
For your convenience, we support multiple payment methods in USD, including PayPal, Credit Card, wire transfer. and Alipay.
RFQ (Request for Quotations) in icwhale.com
It is recommended to acquire for quotations to get the latest prices and inventories about the parts.
Our sales will reply to your request by email within 24 hours.
Warm reminder
1. You'll receive an order information email in your email inbox. (Please remember to check the spam folder if you didn't hear from us).
2. Since inventories and prices may fluctuate to some extent, the sales manager is going to reconfirm the order and let you know if there are any updates.
Shipping & Handling
Shipping fee starts at $35, but some countries will exceed $35. For example (South Africa, Brazil, India, Pakistan, Israel, etc.)
The basic freight (for package ≤0.5kg or corresponding volume) depends on the time zone and countries.
Shipping Method
Currently, our products are shipped through DHL, FedEx, SF, UPS and China Post.
Order Tracking for International Orders
Once your order has been shipped, the tracking number will be sent to the email address registered to your account. This information can also be viewed when logged into your account in the "my account" page.
 A000005 information
Views:
Getting Started with Arduino Nano: Tips for Fast and Easy Setup
When you're getting begun with the Arduino Nano, it can feel a bit overpowering, particularly on the off chance that you're modern to the world of microcontrollers and gadgets. In any case, with the correct direction and a step-by-step approach, you'll discover that setting up your Arduino Nano isn't as it were sensible but moreover an energizing presentation to incalculable imaginative ventures.
What is the Arduino Nano?
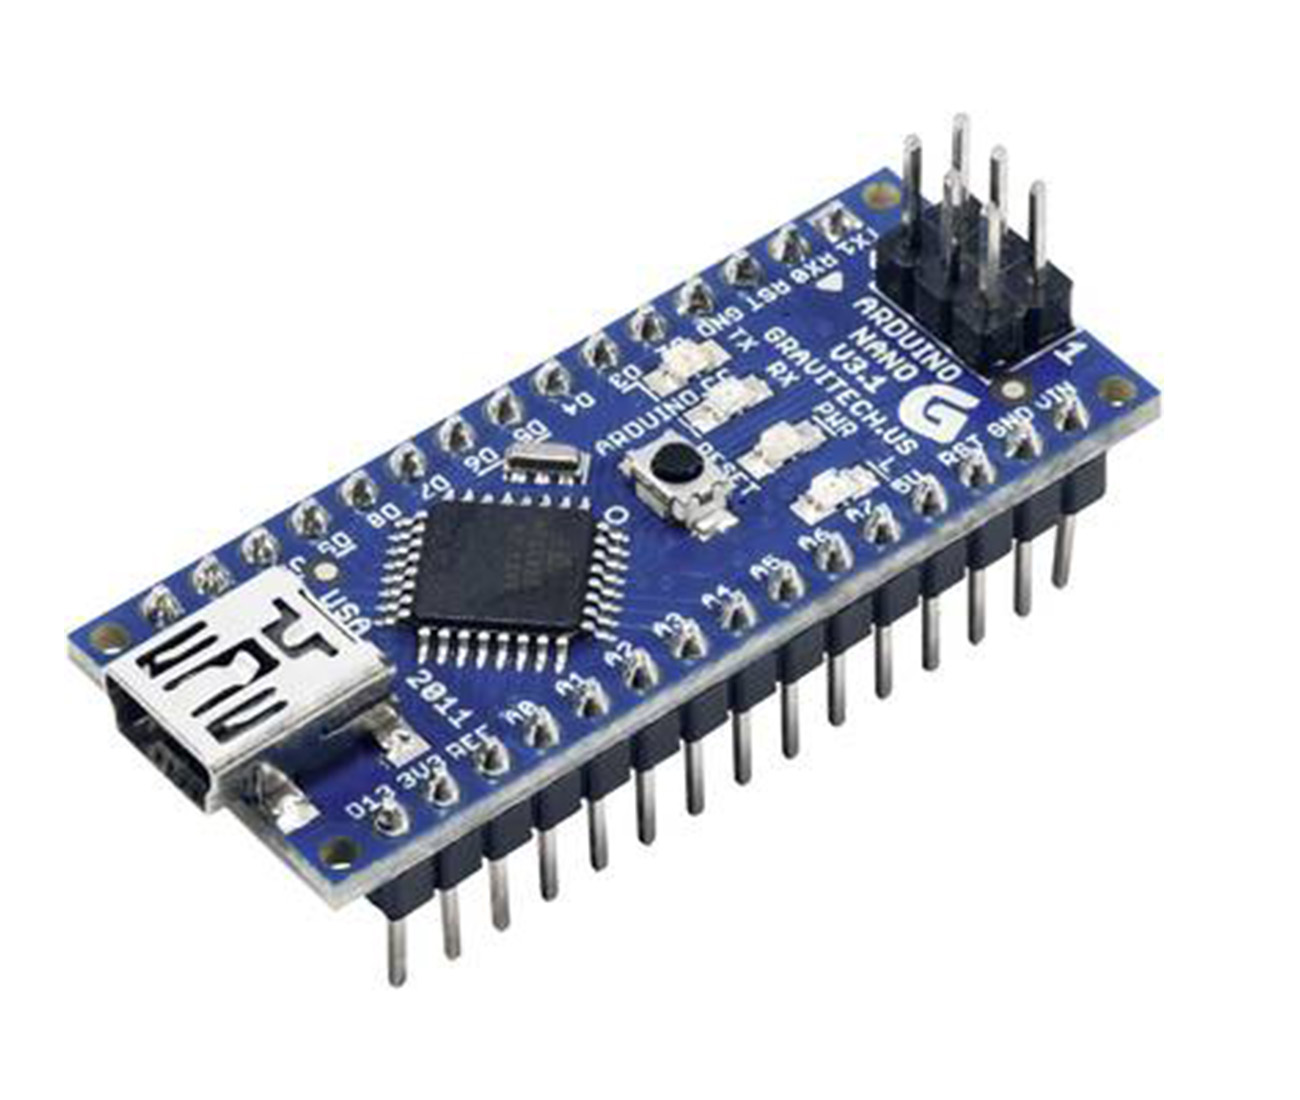
The Arduino Nano may be a little, compact, and flexible microcontroller board that packs a parcel of control into a little frame figure. It's outlined for ventures where space is at a premium, making it a well known choice for specialists, understudies, and indeed experts who ought to coordinated gadgets into tight spaces. In spite of its little estimate, the Nano is completely consistent with most Arduino computer program and equipment, making it a adaptable device for a wide run of applications.
Unboxing and Beginning Setup
Once you to begin with get your Arduino Nano, you'll likely be energetic to jump right in. Here's a speedy direct to getting your board up and running.
1. Interfacing to Your Computer
The primary step in setting up your Arduino Nano is interfacing it to your computer. The board comes with a smaller than expected USB harbour, which you'll utilize to put through it to your computer. Once associated, your computer ought to naturally recognize the gadget and start introducing the necessary drivers.2. Installing the Arduino IDE
Following, you'll have to be introduce the Arduino Coordinates Development Environment (IDE) on your computer. The Arduino IDE may well be a computer program organize that grants you to sort in code, exchange it to your Arduino Nano, and associated with the board. The IDE is available for Windows, macOS, and Linux, and it's free to download from the official Arduino location.3. Selecting the Proper Board and Harbour
Once you've got the IDE installed, open it and explore to the "Instruments" menu. Here, you'll ought to select "Arduino Nano" beneath the "Board" alternative and select the fitting port that your Nano is associated to. This step is significant for guaranteeing that your code is transferred to the right gadget.
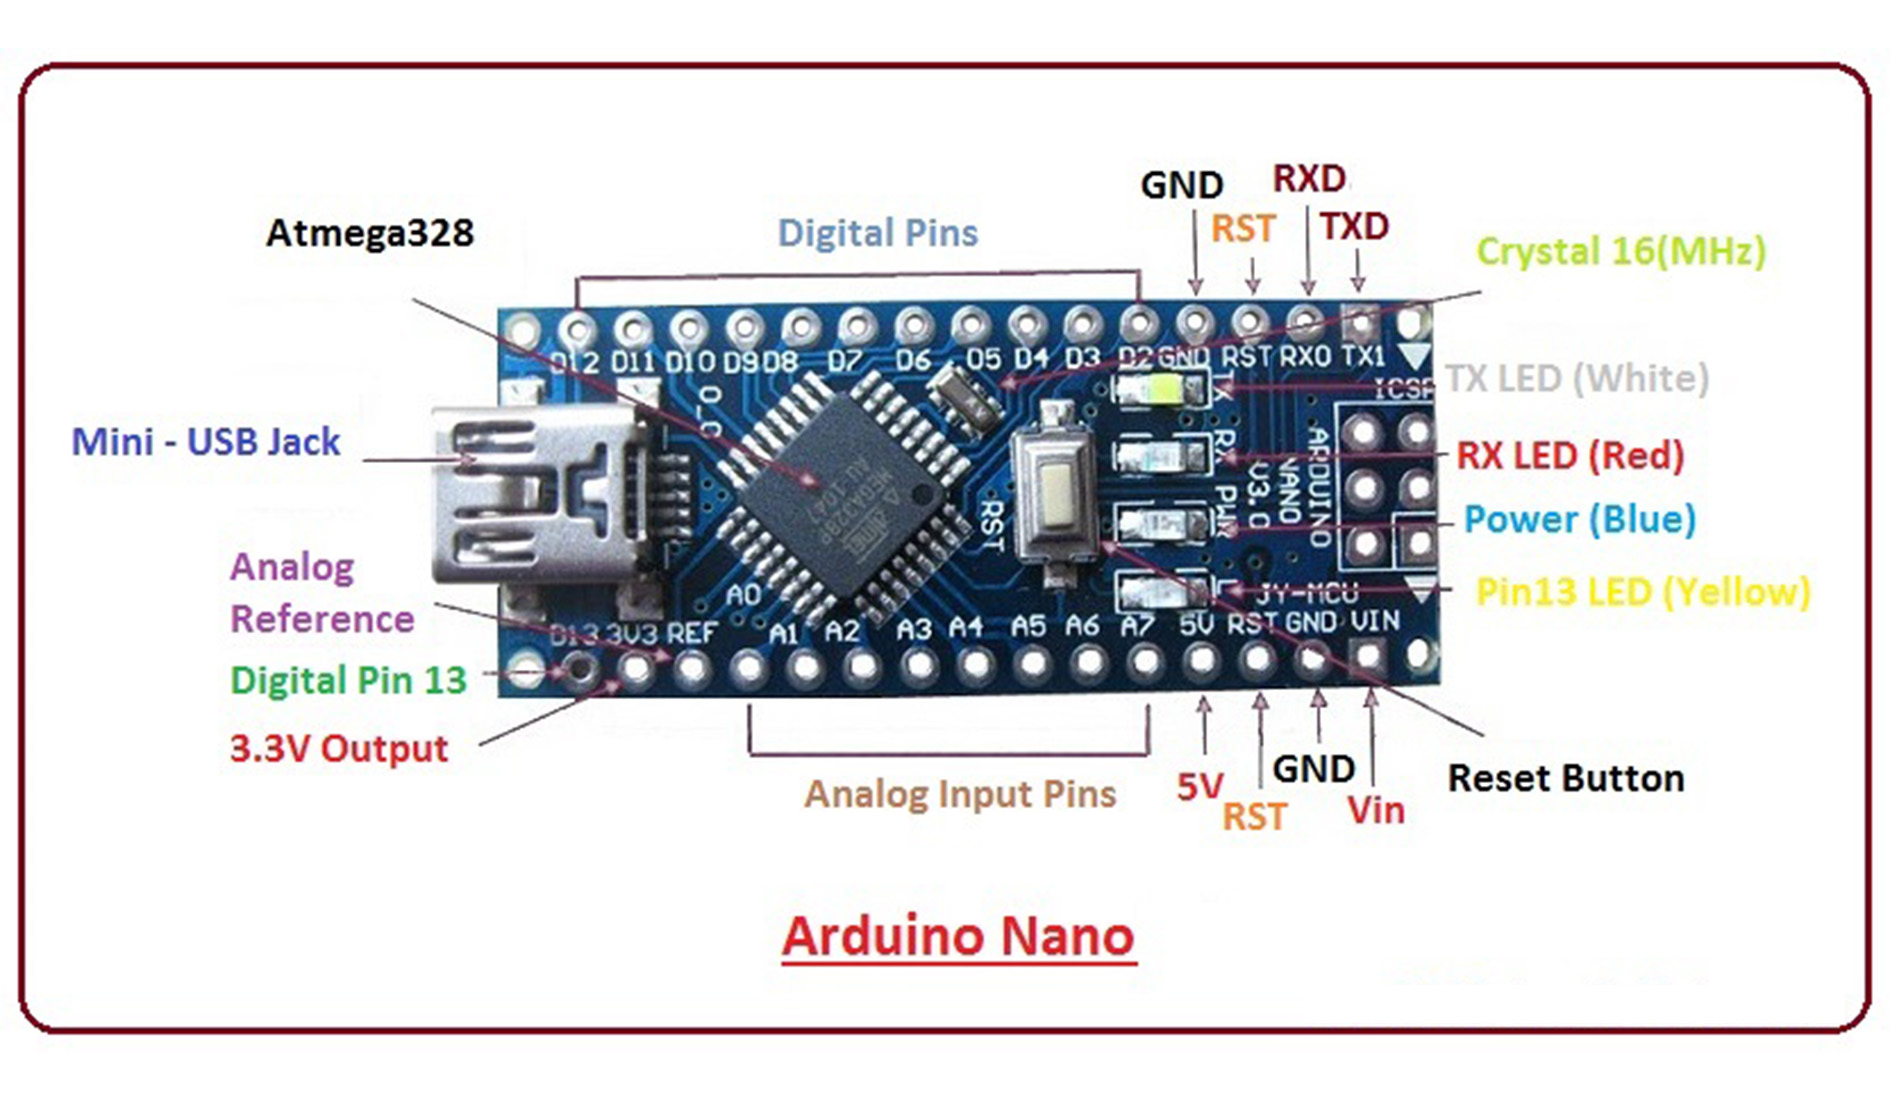
Understanding the Arduino Nano Pinout
One of the foremost imperative angles of working with the Arduino Nano is understanding its pinout. The pinout alludes to the format and work of the pins on the board. Knowing this can allow you to as it should be interface distinctive sensors, actuators, and different additives for your Nano.
The arduino nano pinout consists of 14 superior pins, eight analog pins, and six manipulate pins. Each stick serves a particular work, such as perusing input from a sensor or controlling an yield like an Driven. The computerized pins can be designed as either input or yield, and they work at 5V. The analog pins, on the other hand, are utilized for perusing analog signals and can too serve as extra computerized pins in the event that required.
Advanced Pins
D0-D13: These pins are utilized for general-purpose input/output. A few of these pins moreover have extra capacities, such as D0 and D1, which are utilized for serial communication.Analog Pins
A0-A7: These pins can read analog signals, which are continuous signals as opposed to the discrete signals that digital pins read. Analog pins are particularly useful for reading values from sensors like temperature or light sensors.Power Pins
Six power pins: including VIN for external power input, two GND pins for grounding, 5V and 3.3V for power output, and RST for resetting the board.
Choosing Between Arduino Nano and Arduino Uno
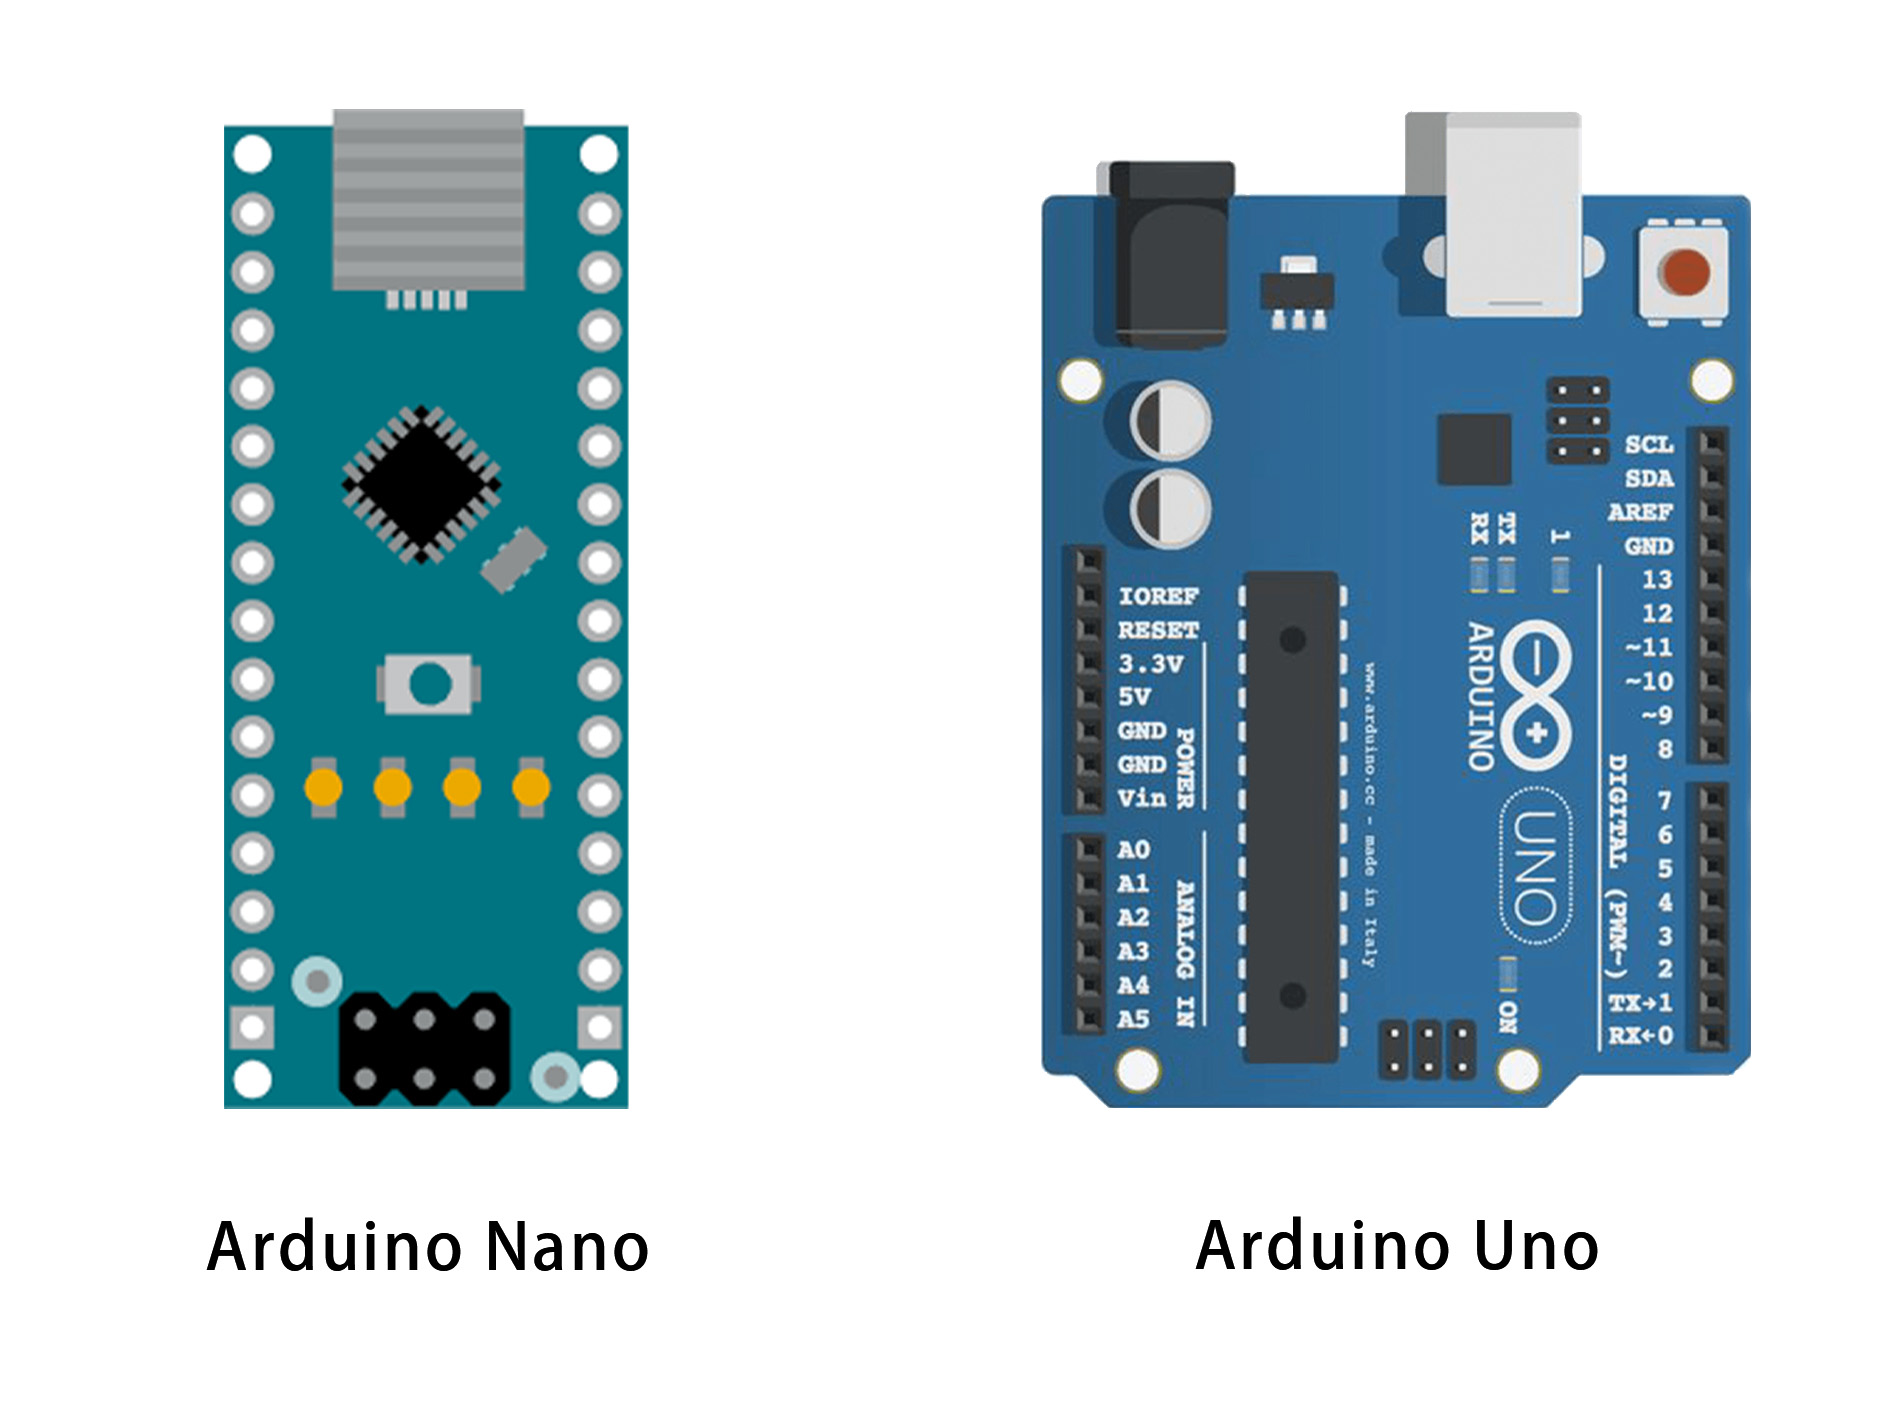
In case you`re selecting among the Arduino Nano and the Arduino Uno, you are now no longer alone. Numerous apprentices and indeed experienced designers confront this choice. The comparison of arduino nano vs arduino uno comes down to your extend prerequisites.
Size: The Nano is much littler than the Uno, making it a stronger choice for compact ventures. In the event that space may be a imperative, the Nano is the way to go.
Functionality: Both sheets offer comparative usefulness, but the Nano's littler measure limits the number of outside associations you'll make effortlessly. The Uno, with its bigger shape calculate, is easier to work with on a breadboard.
Ports: While the Uno encompasses a standard USB harbour, the Nano employments a smaller than expected USB, which may well be a thought depending on the cables you've got accessible.
Growing Memory on the Arduino Nano
One of the confinements of the Arduino Nano is its memory. In the event that you're working on a extend that requires more capacity space, you may well be trying to find an arduino nano with more memory. Whereas the standard Nano comes with 32KB of streak memory, a few progressed clients may consider choices or extensions to extend memory capacity.
However, most beginners won't need to worry about this limitation. For most typical projects, the Nano's memory will be sufficient. If you do run into memory constraints, consider optimizing your code or looking into external storage options like SD card modules.
Breadboarding with the Arduino Nano
Breadboarding may be a principal ability for anybody working with microcontrollers, and the Arduino Nano is especially well-suited for this. Due to its little measure, it's simple to plug the Nano straightforwardly into a breadboard, making prototyping and testing your circuits clear.
When employing a breadboard arduino nano, you'll discover that the stick dispersing is idealize for straddling the center of the board, permitting you to effortlessly interface components on either side. This makes it simple to test out diverse circuit setups without the require for patching, which is perfect for apprentices who are still learning.
Setting Up Your To begin with Venture
Presently simply have your Arduino Nano set up and understand the nuts and bolts, it's time to jump into your to begin with extend. A basic but successful apprentice extend is to form an Driven flickering circuit.
1. Connecting the LED
Take an LED and connect its positive (longer) leg to one of the digital pins on the Nano, for example, D13. Connect the negative leg to a GND pin.2. Writing the Code
Open the Arduino IDE and write a simple code that turns the LED on and off in a loop.3. Uploading the Code
Once your code is written, click the upload button in the Arduino IDE. The LED on your Nano should start blinking, indicating that the code has been successfully uploaded and is running.
Investigating Common Issues
As with any unused innovation, you might run into a few hiccups along the way. Here are some common issues and how to troubleshoot them.
1. Arduino Nano Not Recognized
In case your computer doesn't recognize the Arduino Nano, make sure the drivers are introduced correctly. You'll be able discover the drivers within the Arduino IDE's establishment envelope or on the Arduino website.2. Code Not Uploading
On the off chance that the code isn't uploading, double-check that you've chosen the right board and harbour within the Arduino IDE. Too, make beyond any doubt that no other programs are utilizing the same harbour.3. Components Not Working
In the event that your components aren't working as anticipated, confirm that they're associated to the right pins agreeing to the nano pinout. Double-check your wiring to guarantee there are no free connections.
Conclusion
Getting begun with the Arduino Nano is an energizing travel into the world of hardware and programming. With its compact estimate and effective highlights, the Nano may be a flexible apparatus that can bring your inventive thoughts to life. Whether you're comparing Arduino Uno vs Arduino Nano or investigating the subtle elements of the Nano pinout, this direct ought to allow you the certainty to begin your ventures with ease. Keep in mind, the key to mastering the Arduino Nano is hone, experimentation, and a eagerness to memorize from botches.
A000005 FAQ
1. How to order A000005 on icwhale.com?
Currently, icwhale.com only provide peer-to-peer order processing. While you submit the RFQ, our professional agent will contact you with the competitive prices in the global market, and our agent will prompt you to finish the order if you accept our offers.
2. How does icwhale.com guarantee that A000005 is from the original manufacturer or authorized agents?
We have a professional and experienced quality control team to strictly verify and test the A000005. All suppliers must pass our qualification reviews before they can publish their products including A000005 on icwhale.com; we pay more attention to the channels and quality of A000005 products than any other customer. We strictly implement supplier audits, so you can purchase with confidence.
3. Are the A000005 price and inventory displayed accurate?
The price and inventory of A000005 fluctuates frequently and cannot be updated in time, it will be updated periodically within 24 hours. And, our quotation usually expires after 5 days.
4. What forms of payment are accepted?
Wire Transfer, PayPal, Alipay, Wechat, Credit Card, Western Union, MoneyGram, and Escrow are all acceptable.
Warm Tips: Some orders in certain payment forms may require handling fee.
5. How is the shipping arranged?
Customers can choose industry-leading freight companies, including DHL, UPS, FedEx, TNT, and Registered Mail. Shipping insurance is also available.
Once your order has been processed for shipment, our salesperson will send you an email advising you of the shipping status and tracking number.
Warm Tips: It may take up to 24 hours for the carriers to display tracking information. Usually, express delivery takes 3-5 days, and registered mail takes 25-60 days.
6. What is the process for return or replacement of A000005?
All goods will implement Pre-Shipment Inspection (PSI), selected at random from all batches of your order to do a systematic inspection before arranging the shipment. If there is something wrong with the A000005 we delivered, we will accept the replacement or return of the A000005 only when all of the below conditions are fulfilled:
(1)Such as a deficiency in quantity, delivery of wrong items, and apparent external defects (breakage and rust, etc.), and we acknowledge such problems.
(2)We are informed of the defect described above within 90 days after the delivery of A000005.
(3)The PartNo is unused and only in the original unpacked packaging.
Two processes to return the products:
(1)Inform us within 90 days
(2)Obtain Requesting Return Authorizations
7.How to contact us to get technical supports, such as A000005 pin diagram, A000005 datasheet?
If you need any after-sales service, please do not hesitate to contact us.


Hot Products

EV-ADUCM322QSPZ
Analog Devices Inc.

W5100S-EVB-PICO
WIZnet

NUCLEO-H743ZI2
STMicroelectronics

FRDM-KL25Z
NXP USA Inc.

C8051F310DK
Silicon Labs

W5500-EVB-PICO
WIZnet
C8051F310-TB-K
Silicon Labs
C8051F005-TB-K
Silicon Labs
C8051F340-TB-K
Silicon Labs

C8051F005DK
Silicon Labs
C8051F005DK-U
Silicon Labs

C8051F310DK-U
Silicon Labs
C8051F310DK-B
Silicon Labs
C8051F005DK-J
Silicon Labs
C8051F310DK-J
Silicon Labs
C8051F005DK-E
Silicon Labs
C8051F310DK-E
Silicon Labs
C8051F005DK-T
Silicon Labs
C8051F310DK-T
Silicon Labs
C8051F005DK-A
Silicon Labs
-

-
Phone
+86 135 3401 3447 -
Whatsapp

Upgrading...